How to configure alarm sending function on TP-Link IP cameras
This Article Applies to:
When the TP-Link IP cameras detect a motion, they can send alarms to a specific email address or a FTP server to notify the owner. Here we take TL-SC3130 for example. We also assume that the IP address of the camera is 192.168.1.101.
Step 1
Open your Internet browser and type the IP address of the IP camera into the address bar. Here we take 192.168.1.101 as an example.
If you’ve no idea about the camera’s IP address or cannot login the management page, click on How to login the IP Camera’s Management Page. If you have changed the default port 80, you have to add the port after the IP address (we take 192.168.1.101:8080 as an example), click on How to find out IP address or port of TP-Link IP Camera.

Step 2
In the pop-up window, please type in the username and password of your IP camera. The default username and password are both admin.
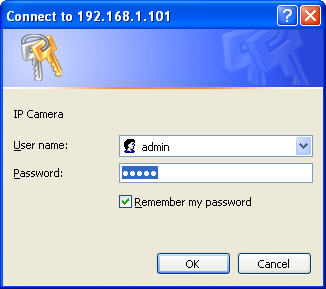
If you changed the username and password before and forgot the username and password, please click here to reset the camera to default settings and then reconfigure the camera.
Step 3
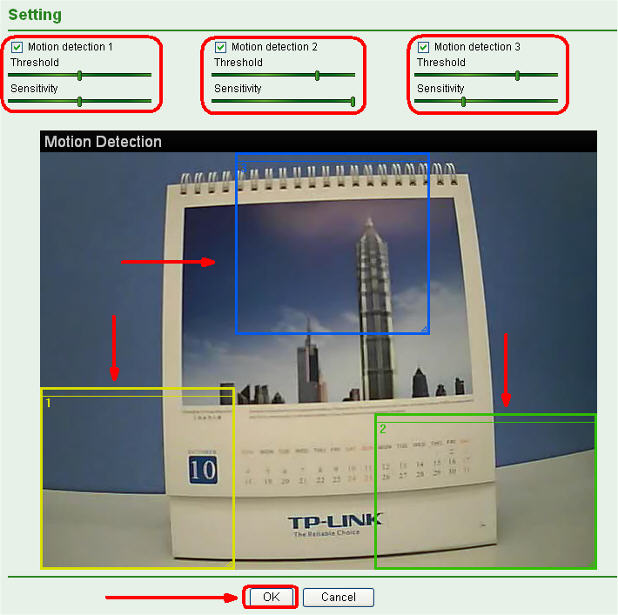
Click Setting->Advance->Motion Detection->Setting on the left hand side.
Step 4
On the right hand side, you can configure 3 motion detection areas. And the threshold and sensitivity can be set separately based on your application. Click OK to save your settings.
Step 5
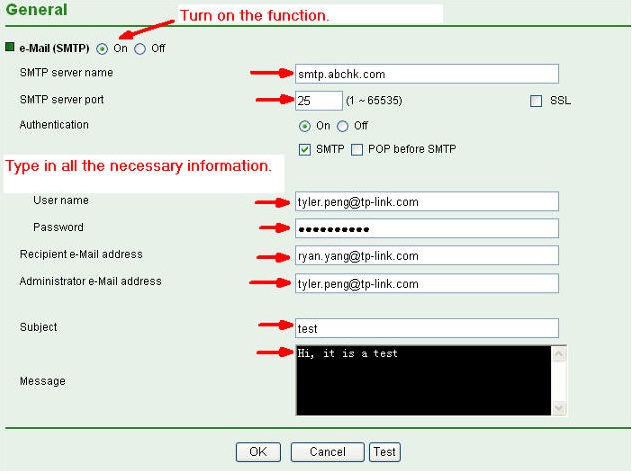
Click SMTP->General on the left hand side, and then type in all the essential information needed on the right. Click OK to save the settings.
Step 6
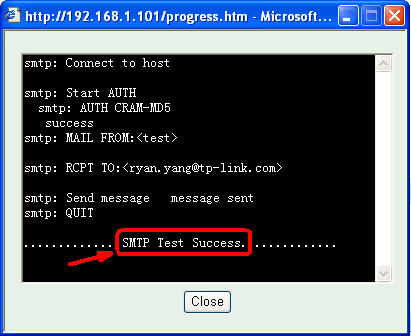
Click Test button to check whether it is working or not. If it works, you will have the picture below.
Note: If you are sure all the configurations are correct but fail to send the email, please double check whether your IP camera is connected to the Internet or not.
Step 7
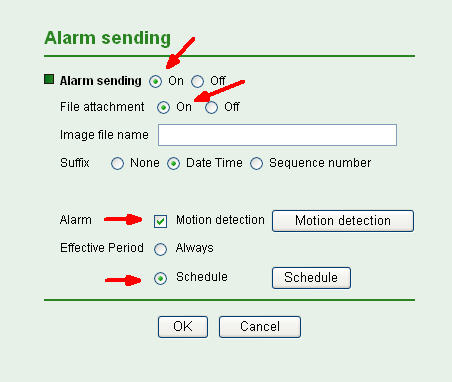
Click SMTP->Alarm sending on the left hand side, and then turn on the function on the right. For Effective Period part, we take Schedule for example.
Step 8
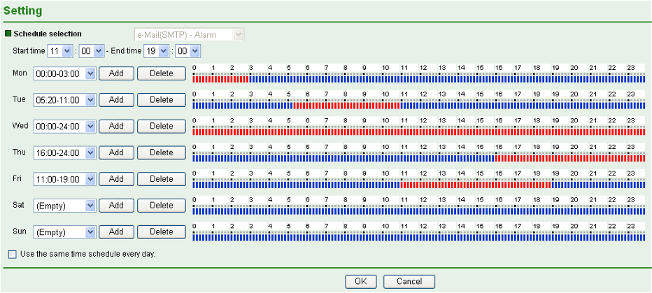
Click Schedule button, it will pop-up a new window like the picture below, and then you can set the schedules for your applications. Click OK to save your settings.
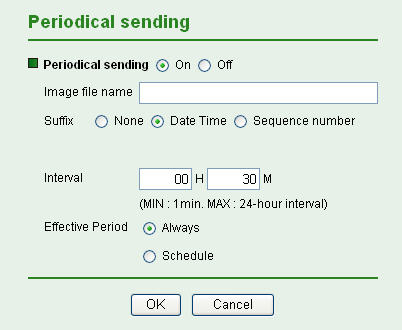
You can also set the camera to send an email to you periodically. Click SMTP-> Periodical sending on the left hand side and enable this function as the picture shown.
Step 9
Now we have done all the configurations and the camera will send an email to you when some motions are detected.
Here is the test. I have received an email already.

And the picture below was attached in the email.
If you still have some problems, please feel free to contact TP-Link support.
Get to know more details of each function and configuration please go to Download Center to download the manual of your product.
Is this faq useful?
Your feedback helps improve this site.
TP-Link Community
Still need help? Search for answers, ask questions, and get help from TP-Link experts and other users around the world.