How to save video by IP surveillance
This Article Applies to:
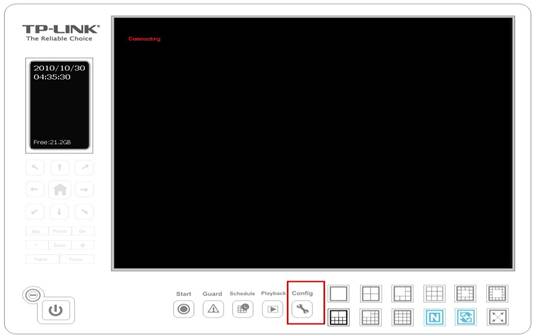
Step 1
Click Config on the main menu page and select Settings.
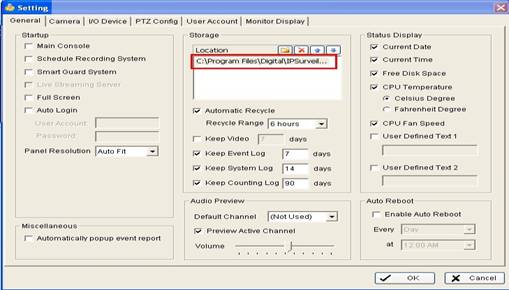
Step 2
Configure the Storage->Location of the video and click OK to save the changes.
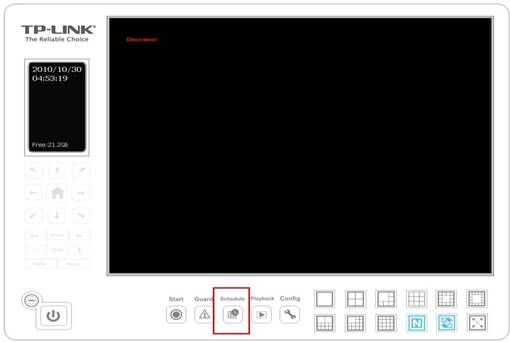
Step 3
Click Schedule menu to configure the schedule.
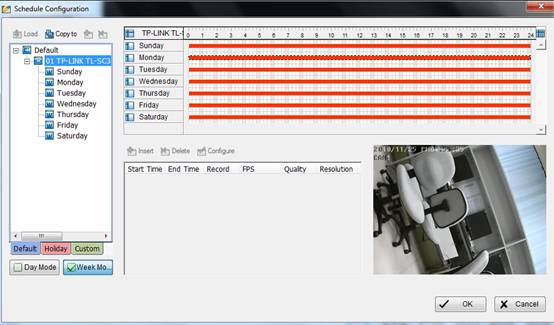
Step 4
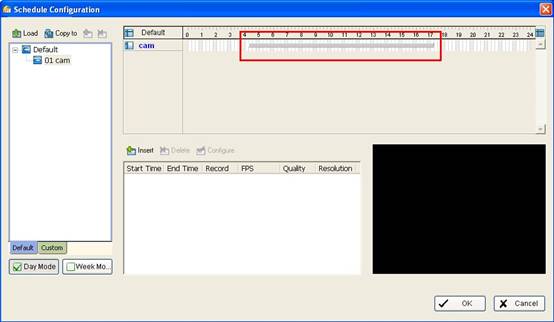
Select the camera which you want to configure on the left side. And select the time mode. We have Day Mode and Week Mode to choose. Here we take Day Mode for example.
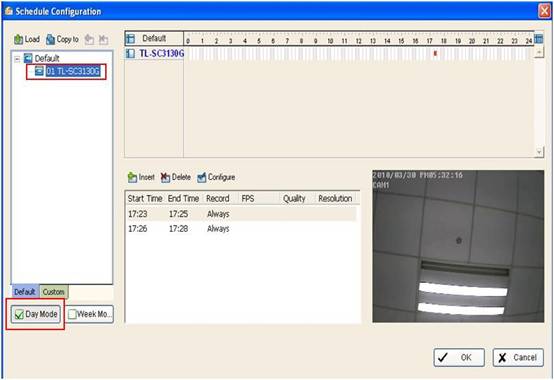
Step 5
Drag the mouse to set a general time frame.
Step 6
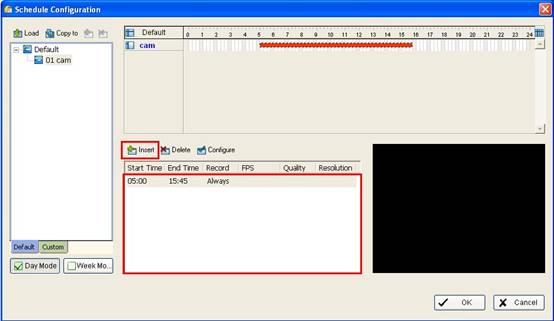
Then click Insert, we will see the details of the recording time as below.
Step 7
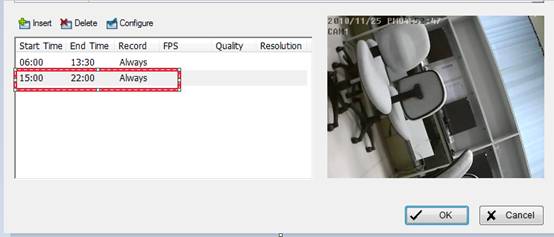
If you want to set the time manually, you can also double click on the time frame.
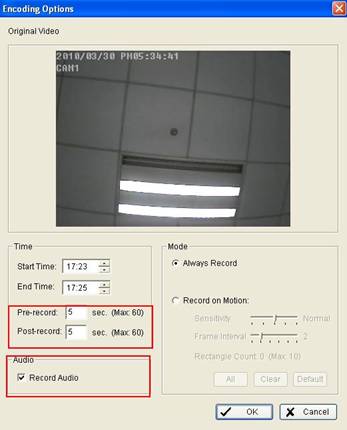
A window named Encoding Options will come out.
Note: If you want to record the sound, please make sure that Record Audio has been checked.
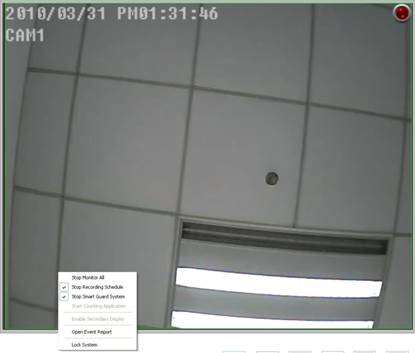
Step 8
Click Start menu on the main page and select Start Monitor All.
If you want to record throughout the week, please check week mode. The week mode is recording 24 hours a day as default, if you want to change the time manually, please double click on the time frame of that day. It will open the Encoding Options for you to change the time settings.
Is this faq useful?
Your feedback helps improve this site.
TP-Link Community
Still need help? Search for answers, ask questions, and get help from TP-Link experts and other users around the world.